Monday, May 26, 2008

Colour Challenge


I haven't had a great deal of time lately to stamp, as you have probably gathered through my intermittent posting but last night and earlier today I managed to make 2 cards. I decided to throw a colour challenge at myself and see what I could do. I went to the SU Color Combo site, and instead of picking a colour and selecting 'search', to see what co-ordinates with that colour, I decided to leave it blank and hit 'surprise me'.  I ended up selecting 6 different colour combinations and will try and make a card or item using those combinations over the next week or so.

The first 2 cards are using the 1st combination which was Very Vanilla, Bravo Burgundy, Soft Sky, Close to Cocoa and Not Quite Navy. I chose to use the Brocade Basics stamp set and see what I could create. 

Brocade Basics 3

This card was my first creation. Not too sure on this one though. Maybe another layer under the Very Vanilla cardstock? Or should I have left the 'cherish' stamp off altogether? Maybe it's just the way I chose to lay out the colours?  Oh well, I've now used the clear rhinestone brads from my Pretties Kit at least.


I stayed with the same stamp set for my second attempt at getting a satisfying end result from this colour combination and I must say I do like this second card much better. This time round I substituted the Close to Cocoa cardstock with some Close to Cocoa Prints designer series paper. I was also planning on using the 5/8" Bravo Burgundy Grosgrain ribbon until I went to my ribbon container and realised I hadn't ordered that one yet. Bugger.

Seeing how my birthday is coming up next week I decided to place an order for a few other items on my wishlist which includes this ribbon. Hubby only asked me yesterday what I wanted and there was nothing I could think of. If I suggested stamping stuff to him he'd only come out with 'haven't you got enough' so I don't bother suggesting and just buy something for myself. 

Brocade Basics 4

I was going to wait until my order arrives (hopefully by the end of the week) to finish off this card, but then I decided to go another way and used the 1/4" Bravo Burgundy grosgrain ribbon instead. Oh well, I'll use the 5/8" another time.

I've stamped the word 'cherish' onto Very Vanilla and punched out using the large oval punch. This has then been mounted onto the Designer Label Punch. I had to use a retired item then (naughty me), the rectangle handheld punch, to punch the slits to thread the ribbon through. I could have used the horizontal punch but I wanted a snug fit around the ribbon.

So which do you prefer?

Why not try creating something yourself using this colour combination and post a comment with a link to your creation.

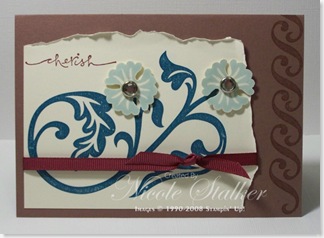
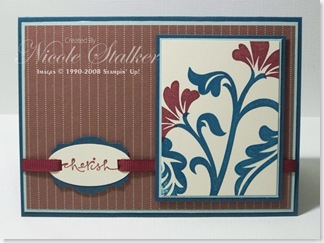
 photo Nikki4.png

Monday, May 19, 2008

The little things....


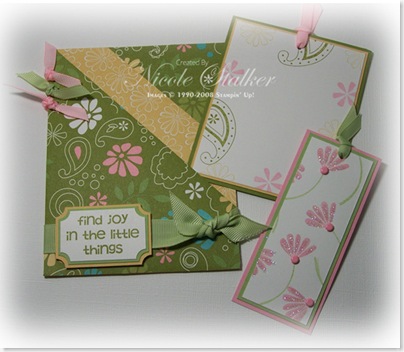
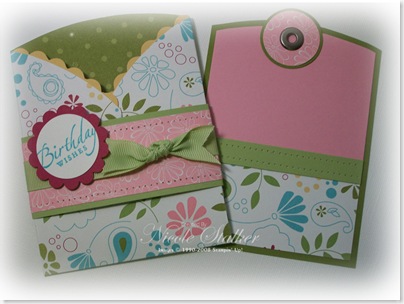
Today I decided to make a double pocket card. This card is very easy to make although you don't want to do what I did the first time. I like things neat and tidy and areas that can be sealed, stuck so there is no chance of them unfolding later on. Well I got a little carried away with where I should put the adhesive on the first one and ended up sticking the first pocket shut....LOL. Oh well, these things happen so I just pulled out another piece of Petals & Paisley Double-sided Designer Series Paper and started again, this time paying more attention to what areas I was applying adhesive to.

Here is the finished correct card with the pockets filled:

Petals & Paisley Double Pocket copy


and here is the card & tags. I've left the centre of the larger one free so I can write something when I decide to send it on to someone.

Petals & Paisley Double Pocket & Tags copy


These cards are a great way to use up some of that double-sided paper we sometimes hesitate to use.

You can find a tutorial for these cards here.

Supplies:
Stamp sets: Polka Dots & Paisley, Polka Dots & Petals
Card: Old Olive, So Saffron, Certainly Celery, Pretty In Pink, Whisper White, Petals & Paisley DSP
Inks: Old Olive, So Saffron, Certainly Celery, Pretty In Pink
Accessories: Pretty In Pink 1/4" grosgrain ribbon, Certainly Celery 1/4" & 5/8" grosgrain ribbon, Pretty In Pink brads, Crop-A-Dile, Two-Way Glue Pen, Dazzling Diamonds, Slit Punch, Stampin' Dimensionals.


 photo Nikki4.png

Sunday, May 18, 2008

Priceless Waterfall


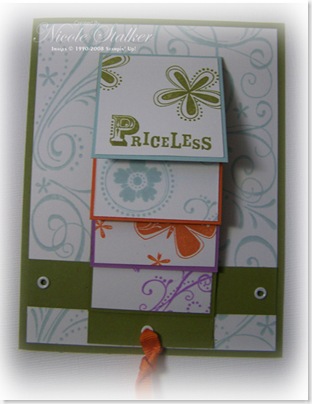
Well you may have guessed by the title that today's card is a Waterfall Card. This is my first time at making one of these and they really aren't that hard or time consuming either. I tend not to make what I think are fiddly construction type cards as I always think they will take forever, so I was quite surprised.

The colours in this card are from the Mix it up with Color combination chart that SU provide to it's demonstrators to show us different colour combinations using the new In Colors and our permanent colours families. This combination is using the new In Colour - Soft Sky and it's combined with Old Olive, Pumpkin Pie & Orchid Opulence.

I'm in two minds with this card. I'm excited as I made my first Waterfall card and am happy with the results of that, I think the Priceless stamp set is a good one to use but I'm still not 100% sure on the colour combination or the way I've combined it. I'll be creating a few more of these I think and playing with some other colours which I'll share later on.

Here is my card:

Priceless Waterfall_a copy


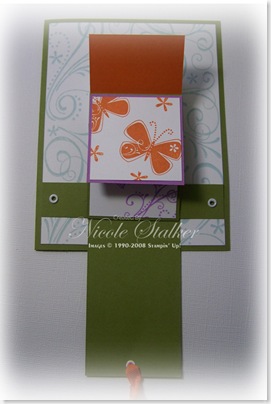
and here it is when I pull the tab to create the waterfall effect:

Priceless Waterfall_b copy


So what's your take on the colours?? I love all feedback and suggestions so please let me know what you think.

Supplies:
Stamp sets: Priceless, So Swirly Jumbo Wheel
Card: Old Olive, Soft Sky, Pumpkin Pie, Orchid Opulence, Whisper White
Inks: Soft Sky, Old Olive, Pumpkin Pie, Orchid Opulence
Accessories: Crop-A-Dile, White Eyelets, Pumpkin Pie grosgrain ribbon.


 photo Nikki4.png

Saturday, May 17, 2008

Tri-Fold Birthday

Unfortunately it was another busy week for me this past week, hence the lack of posts. However, last night was stamp night with a few friends and I managed to create a few things amongst all the chatter, nibbles & cuppa's.

You may have noticed that most of my cards are standard cards, meaning they are a standard size and a standard opening. Well last night I decided to do something a little different, for me anyway, and I made a Tri-Fold Pocket card and another construction type card (this will be posted tomorrow so I'm not going to tell you what sort of card it is, you'll have to come back to find out). I'll be playing with more construction cards today which I'll share with you this week too as it's a little quieter.

The instructions for the Tri-Fold Pocket card can be found here on SplitCoastStampers, along with many other techniques and construction cards. If you haven't checked out SplitCoastStampers before, then do yourself a favour, grab a cuppa and get ready to spend the next few hours (or whatever you can spare) being amazed at all the wonderful creations, techniques, tutorials and information that is shared. I guarantee if you visit once, you'll visit often.

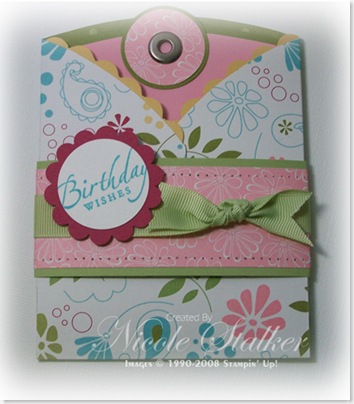
Here is my Tri-Fold Pocket Card:

Tri-Fold card_a copy

and here's a look at the card & insert:

Tri-Fold card_b copy

This was a fun card to make and quite easy when you have a tutorial to follow. It's also a great way to use those lovely Double-sided Designer Series Papers Stampin' Up sell.

Supplies:
Stamp sets: Sincere Salutations
Card: Certainly Celery, Old Olive, Pretty In Pink, Rose Red, So Saffron, Whisper White, Petals & Paisley DSP
Ink: Taken with Teal
Accessories: Certainly Celery 5/8" grosgrain ribbon, 3/16" corner rounder punch, Scallop Circle punch, 1 3/8" & 1 1/4" Circle Punches, Crop-A-Dile, Pewter Jumbo Eyelets, Sticky Strip, Paper Piercing template & tool.


 photo Nikki4.png

Tuesday, May 13, 2008

Boho Thanks


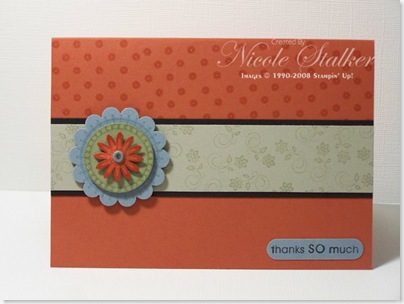
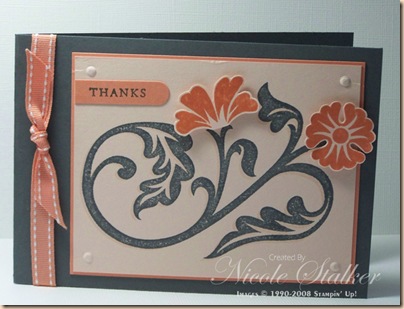
After spending most of my day washing and ironing, oh and the fish love me again as their tank if finally clean, I took some time out this evening to stamp. I wanted to use the same colour combination as in yesterdays card and also use the Boho Backgrounds set again. The eyelet centre has some Crystal Effects added to create, what Marelle has called, Cheat Bling.

This is the end result.

Boho Backgrounds 2

Supplies:
Stamp sets: Boho Backgrounds, So Many Sayings
Card: Really Rust, Basic Black, Sahara Sand, Bordering Blue, Mellow Moss
Inks: Really Rust, Sahara Sand, Bordering Blue, Mellow Moss, Basic Black Marker
Accessories: Word Window Punch, Scallop Circle Punch, 1/1/4" Circle Punch, Rich Regal Brads, Crystal Effects, Stampin' Dimensionals


 photo Nikki4.png

Monday, May 12, 2008

Wonderful Friend


I did it. I managed to create one card today. Don't laugh, that's better than none, isn't it? I spent most of the morning finishing up my website revamp instead. Pop on over and take a look. It's nothing fancy, but it's definitely brighter than it was. I still want to tweak a few things I'm not overly happy with but it's a start.

Onto the card.

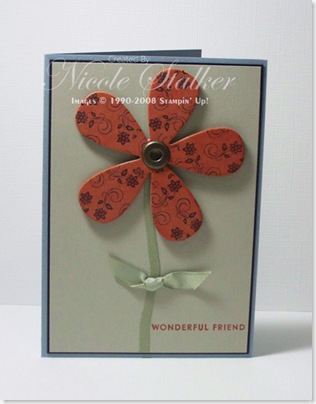
This is my 1st card I've ever made (not including those from SU events of course) using some Chipboard, so totally my creation. I'm rather happy with it too, so I hope you like it. The colour combination is one from the SU Color Combos website.

Boho Backgrounds Chipboard Flower copy

Supplies:
Stamp sets: Boho Backgrounds
Card: Bordering Blue, Basic Black, Sahara Sand, Mellow Moss
Ink: Basic Black, Really Rust Inkpad & Marker
Accessories: Chipboard flower (On Board Blossoms & Basics), Antique Brass Jumbo Eyelet, Mellow Moss Taffeta Ribbon, Stamp-a-ma-jig, Stampin' Dimensionals.


 photo Nikki4.png

I'm revamping

You have probably just noticed that my colours and layout have changed. I'm in the process of updating my website also but nothing too fancy, just thought they both needed a bit of a lift. As they say 'a change is as good as a holiday'. The updated website should be up some time this week.

After creating this card which I loved, I decided to use those colours and a few more. Any ideas what other colours I've used?? I picked a combination from the SU Color Combos site which made the extra colours much easier to pick.

This is part of the reason for my lack of card postings this past week but overall it was just a very busy week for me. This week isn't a great deal better but I'm hoping to create today so I should have something to share this evening or tomorrow at the latest.


 photo Nikki4.png

Thursday, May 8, 2008

I've been Tagged

Wow this is a first for me but I'm so exciting as it means there are people out their who are enjoying my blog.

I've been tagged by Sam Coppack  www.samcoppack.blogspot.com

The rules are...
1. Link your tagger and list these rules on your blog.
2. Share 7 facts about yourself on your blog, some random, some weird.
3. Tag 7 people at the end of your post by leaving their names as well as links to their blogs.
4. Let them know they have been tagged by leaving a comment on their blog .


My 7 facts:

1. I have 4 daughters. My eldest is 12 1/2 yrs and my youngest is 6 1/2 years and there is 6 years and 2 days between their birthdays.

2. I have an older brother and 2 younger sisters. My younger sister also has 4 girls.

3. My husband and I will be married 13 years this August.

4. I have done lots of other crafts prior to stamping such as: knitting, crochet, spinning, macrame, cross-stitch, patchwork & quilting, sewing, machine embroidery & smocking.

5. I made 3 of the 4 Christening Gowns for my girls. My mother purchased my eldest's. They therefore each have their own to carry on down through their family if they so choose way, way, way down the track...

6. When I make a card it has to be just right. If it's not something I would like to receive then I don't expect anyone else to either. This always applied to any other craft too.

7. I hate ironing and cleaning bathrooms..... but who doesn't.


Now onto the part of tagging 7 others 

I'm going to tag some blogs/websites that I really enjoy visiting and hope they don't mind. Sam tagged some I would have also (like Marelle, Alisa and Sarah) so I'll list others instead. My upline doesn't have a blog and neither do my downlines or sidelines at present so these are fellow demonstrators and some US demos.


These ladies I know:

Jayne Mercer  http://www.jaynemercer.com/blogs/index.php

Joanna Wassens  http://www.joannawassens.com/

Leonie Schroder http://www.totallyaddinktive.com/index.php

Karen Oliver  http://www.kareninks.com/page2.php


Unfortunately I haven't met these ladies but given the opportunity I'd love to.

Caroline Colgan http://www.carolinesstamppad.blogspot.com/

Michele Force http://micheleforce.blogspot.com/

Beate  http://beate.blogs.splitcoaststampers.com/


Thanks Sam


 photo Nikki4.png

Monday, May 5, 2008

Thank You Petals....

I've had a very busy day today with my team training earlier in the day and then 3 of my girls have Girl Guides on Monday afternoon but at 2 different times. Makes for a very busy Monday afternoon and is part of the reason why my posting is so late today. 


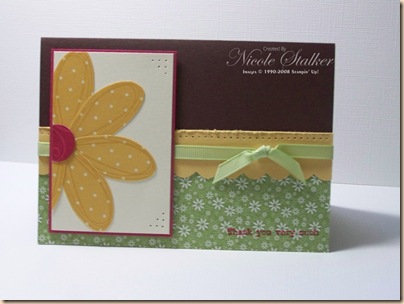
Today's card is using the Pick-A-Petal set again along with some of the Prints Designer Series Paper Sampler Pack from this months Palette O'Prints Promotion. Granted I've now used all these supplies before but some of them are still new, like the Pick-A-Petal Stamp set and of course the Designer Series Paper.

This card hasn't really gelled with me yet. I'm not too sure if I like the 'Thank you very much' stamp and am thinking it might have looked better on the Word Window Punch on Very Vanilla card (this idea is just coming to me now as I'm typing this post) so may try that in the morning and repost. Let me know if you have any suggestions.


Pick A Petal 2

Supplies:
Stamp Sets: Pick-A-Petal, Much Appreciated
Card: Chocolate Chip, So Saffron, Rose Red, Very Vanilla, So Saffron DSP, Rose Red DSP, Certainly Celery DSP
Ink: So Saffron, Rose Red
Accessories: Paper Piercing template & tool, 3/16" Corner Rounder Punch, Certainly Celery 1/4" Grograin ribbon, Cutter Kit, Stampin' Dimensionals.


 photo Nikki4.png

Sunday, May 4, 2008

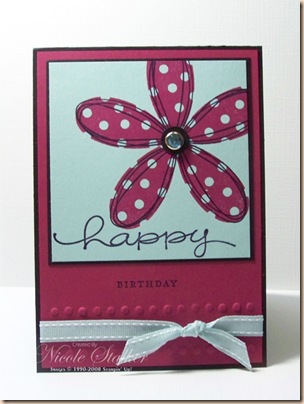
Pick A Petal Birthday

I've used my new Pick A Petal stamp set in this card. Other new items used for those that may be keeping up with my challenge are: Purely Pomegranate cardstock & Ink, Soft Sky cardstock, Rhinestone Brad(Ice), Crop-A-Dile & Soft Sky double-stitched ribbon. It may have been easier to just say everything is new apart from the Basic Black I've used.....LOL


I chose my colours for this card from SplitCoastStampers colour challenge for this week CC164 of Basic Black, Purely Pomegranate & Soft Sky.


Pick A Petal 1


Supplies:
Stamp sets: Pick A Petal, Happy Everything
Card: Basic Black, Purely Pomegranate, Soft Sky
Inks: Basic Black, Purely Pomegranate
Accessories: Rhinestone brads (Ice), Soft Sky double-stitched ribbon, Crop-A-Dile, Stamp-A-Ma-Jig.


 photo Nikki4.png

Saturday, May 3, 2008

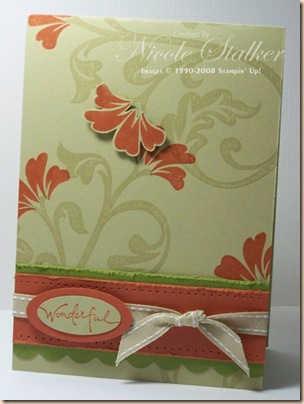
Wonderful Brocade

This of course is my 2nd card with the Brocade Basics stamp set and I'm much happier with this card. This colour combination is just gorgeous, I think anyway.  I've used River Rock (I can see this being a favourite), Old Olive (already a favourite) and Really Rust (a colour I like but don't often think to use).

There are 5 new items used in this and they are:In Colour cardstock & matching inkpad, stamp set, double-stitched ribbon and the new 3/16" corner rounder punch. I can't believe how well I'm doing and just hope I can keep it up. If I can, I doubt there will be anything I'll lose next Catalogue retirement that I haven't used at least once.


Brocade Basics 2


Supplies:
Stamp sets: Brocade Basics, Warm Words.
Card: River Rock, Old Olive, Really Rust
Inks: River Rock, Really Rust
Accessories: River Rock double-stitched ribbon, 3/16" Corner Rounder punch, Small & Large Oval Punches, Cutter Kit, Paper Piercing Template & Tool, Stampin' Dimensionals.


 photo Nikki4.png

Friday, May 2, 2008

Basic Brocade

I'm using the Brocade Basics stamp set today and went with Colour Challenge CC162 from SplitCoastStampers.

You can't really notice in the picture but I've stamped the flower stems a second time in Blush Blossom and slightly offset. It gives a shadow effect.

I'm not too sure on this one though. Don't know if it's the colours, layout or whether it just needs something else to boost it. Maybe when I get the Pretties Kit I might think about adding a half pearl to the card. Any suggestions??


Brocade Basics 1


If you are keeping up with my challenge I've used 6 new items.


Supplies:
Stamp sets: Brocade Basics (new), Sincere Salutations
Card: Basic Gray (new), Groovy Guava (new), Blush Blossom
Inks: Basic Gray (new), Blush Blossom, Groovy Guava (new)
Accessories: Groovy Guava double-stitched ribbon (new), Crop-A-Dile, Word Window Punch, Stamp-A-Ma-Jig, Stampin' Dimensionals.


 photo Nikki4.png

Thursday, May 1, 2008

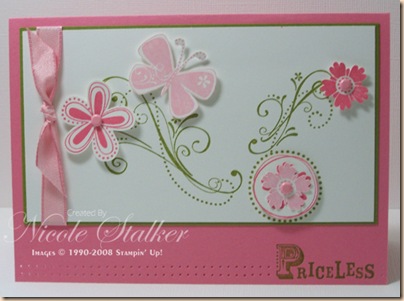
Pretty Priceless

Today's Priceless card was inspired by this card which had been CASED from this card and I created this card:

Priceless 2

The colours are a colour challenge CC124 and my card is based around Card Sketch challenge SC72. I really like how this came out and just love these colours together.

To keep with my challenge I've used 2 new items being the Priceless stamp set and also the Pretty In Pink Taffeta ribbon. I'm really loving the taffeta ribbon and although it is quite different from the Organdy ribbon that retired I'm much happier with the taffeta.

Supplies:
Stamp set: Priceless
Card: Regal Rose, Old Olive, Whisper White
Ink: Old Olive, Regal Rose, Pretty In Pink.
Accessories: Pretty In Pink taffeta ribbon, Soft Subtles brads, Paper Piercing template & tool, Stampin' Dimensionals.


 photo Nikki4.png