Monday, July 28, 2008

Berry Kind

All the Designer Series Papers in the Idea Book & Catalogue and the new Spring Mini are just gorgeous but I'd have to say one (repeat ONE) of my favourites is the Berry Bliss pack. I love the colours of Close to Cocoa, Pretty in Pink, Purely Pomegranate and a touch of Whisper White together. They just co-ordinate so well.

I was playing around with these papers Saturaday night along with the One of a Kind stamp set and Boho Blossoms Punch which all co-ordinate with each other and came up with 2 cards.

I wanted to make a card for a Sketch Challenge on a yahoo group I'm in and also a card to add to a promotion on my newsletter. I thought I'd combine the 2 and therefore only need to make 1 card. Well things didn't go as planned so hence the 2 cards.

I started on the Sketch card and had all the back layers done which I was happy with and just needed to work on my main focal image. I also wanted to used the matching stamp and punch on the card. I made up my focal piece but it just wasn't working with the card however I did still like it. This was how the second card came about. I put the first one aside and the second card came together very quickly using the focal image I'd already prepared. Well once I finished that card the idea of how to finish the second card came to me and well that didn't take much longer either.


One of a Kind 2

So here is the first card I ended up completing which is actually my second card I started.....(hope you understand that). Now the Pretty in Pink piece on the bottom section of the card is from the Berry Bliss DSP it just doesn't show up real well in the photo. It's a colour on colour print.

 Supplies:
Stamp sets: One of a Kind
Paper: Close to Cocoa, Purely Pomegranate, Whisper White, Berry Bliss DSP
Ink: Purely Pomegranate, Close to Cocoa, Pretty in Pink.
Accessories: Boho Blossoms Punch, Purely Pomegranate double-stitched ribbon, Stampin' Dimensionals, sponge dauber, Mini Glue Dots, Soft Subtles Brads.


And then here is the second card I completed which of course makes it the one I started first and the one for the Sketch Challenge. The focal image on the previous card was what I initially was going to add but it just looked to big and One of a Kind 1busy. I was much happier with this look. I think it shows off the papers more.
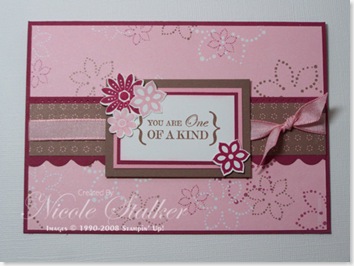
 

Supplies:
Stamp set: One of a Kind
Paper: Purely Pomegranate, Pretty in Pink, Close to Cocoa, Whisper White, Berry Bliss DSP.
Inks: Close to Cocoa, Purely Pomegranate, Pretty in Pink
Accessories: Pretty in Pink Taffeta ribbon, Small corner rounder punch, Boho Blossoms Punch, sponge dauber, Stampin' Dimensionals, Mini Glue Dots.

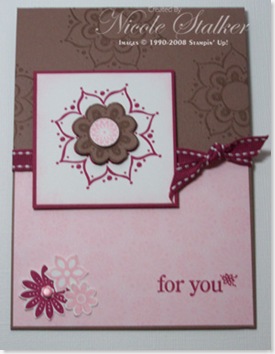
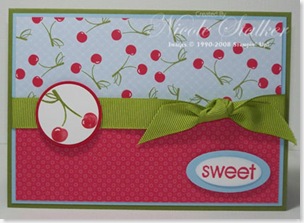
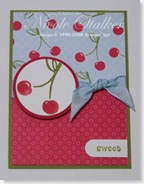
 photo Nikki4.png

Sunday, July 27, 2008

Sweet Cherries

This card is made using another new stamp set (die-cut of course like all the mini stamp sets) and co-ordinating double-sided designer series papers (at a fabulous price of only $11.95 for 12 sheets) that are in the new Spring Mini Catalogue available from 1st August - 30th November.

This set is called Tart & Tangy and is only $21.95. It is a set of 4 lovely fruit stamps which consist of a strawberry, orange, apple and of course cherries. It's a great set for lovely summery cards and the co-ordinating papers just add that extra touch. Don't forget if you don't have a copy of the mini yet I'll be mailing mine out on Monday so contact me asap and I can send one out to you too.


This is a card and ATC made using the Tart & Tangy stamp set with some of the co-ordinating papers. These have been made for a swap that I'm in on a Stamp Group.

Tart & Tangy 1 Tart & Tangy ATC 1

Supplies: Card
Stamp sets: Tart & Tangy, Sweet Shapes
Paper: Old Olive, Bashful Blue, Real Red, Whisper White, Summer Picnic DSP
Inks: Real Red, Bashful Blue, Real Red & Old Olive Stampin' Write Markers
Accessories: Old Olive 5/8" grosgrain ribbon, 1 1/4" circle punch, 1 3/8" circle punch, small & large oval punches, sponge dauber, Stampin' Dimensionals.

Supplies: ATC
Stamp sets: Tart & Tangy, Everyday Flexible Phrases
Paper: Old Olive Whisper White, Real Red, Summer Picnic DSP
Ink: Old Olive, Real Red & Old Olive Stampin' Write Markers
Accessories: Bashful Blue Taffeta ribbon, 1 1/4" circle punch, 1 3/8" circle punch, word window punch, Stampin' Dimensionals.


 photo Nikki4.png

Saturday, July 26, 2008

Oh So Lovely

This was the first Level 1 Hostess set I just had to get my hands on but as usual I haven't used it much yet. So many other lovely sets that I purchased when the new catalogue was released and just not enough time or desire to stamp lately. Well things are going to change.

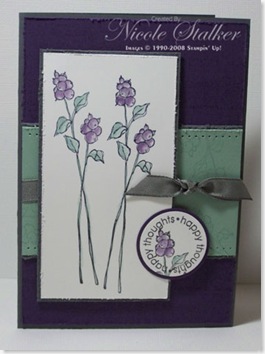
I made a card earlier in the week which I cased from Teneale's gorgeous card which can be seen here, for a class I was holding on Thursday night. I just loved the colour combination. Unfortunately the class had to be postponed to this week but I don't think my ladies have internet access or visit my blog so I'm still going to share it with you.

Oh So Lovely 1

My version of Teneale's card has a few visible differences. Teneale has added the extra touch of outlining her images in a grey marker to make them pop and also used the Linen background stamp on the Elegant Eggplant cardstock where I have just used the background image from the Oh So Lovely stamp set. I did this to cut down on time for my class. My ladies are reasonably beginners so I will teach that extra step in another class. I might make another though to show them how to step-it up using this method.

Supplies:
Stamp sets: Oh So Lovely, Think Happy Thoughts
Paper: Basic Gray, Sage Shadow, Elegant Eggplant and Whisper White.
Inks: Basic Gray, Sage Shadow, Elegant Eggplant
Accessories: Cutter Kit, 1 1/4 circle punch, 1 3/8 circle punch, Basic Gray Taffeta ribbon, Paper Piercing template and tool (Tool Kit), Blender Pens, Stampin' Dimensionals.


Oh So Lovely 2

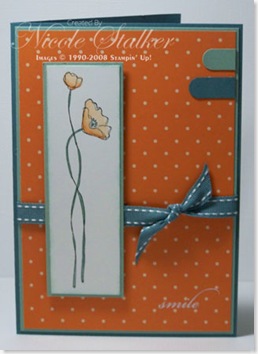
This card I made as part of a Colour Challenge for a demonstrator group I'm in. The colours we needed to use are Blue Bayou, Sage Shadow, Pumpkin Pie and Whisper White. I ended up making 2 very similar cards and this was my first.

Supplies:
Stamp sets: Oh So Lovely
Paper: Blue Bayou, Sage Shadow, Whisper White, Pumpkin Pie DSP
Inks: Stazon Black, Blue Bayou, Sage Shadow, Pumpkin Pie & Sage Shadow Stampin' Write Markers.
Accessories: Word Window Punch, Blue Bayou double-stitched ribbon, Eastern Elegance Rub-Ons, sponge dauber, Stampin' Dimensionals.


Oh So Lovely 3

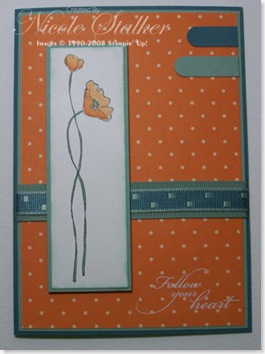
This is of course my 2nd card. I'm sure you can spot the differences. I'm not sure if I like one more than the other. Do you have a preference??


Supplies:
Stamp sets: Oh So Lovely
Paper: Blue Bayou, Sage Shadow, Whisper White, Pumpkin Pie DSP
Ink: Stazon Black, Blue Bayou, Sage Shadow, Pumpkin Pie & Sage Shadow Stampin' Write Markers.
Accessories: Word Window Punch, Eastern Elegance Rub-ons, Sponge dauber, District Ribbon Originals, Stampin' Dimensionals.


 photo Nikki4.png

Friday, July 25, 2008

True Friend and a new Mini

That's right there is a new Mini about to be released. As a demonstrator you get the month prior to preorder so you can whip us some samples and prepare workshops, classes, etc.  Not a lot of that happening here as you may have read in my last post but it's still fun to play.....

The new Mini is due to be released on the 1st August and will continue until 30th November. I will be sending out copies of the mini catalogue on Monday to my customers so if you don't yet have a copy and would like one please email me with your information and I'll get one out to you on Monday too.

I would have to go as far as saying that this mini catalogue, the Spring Mini is by far the best mini ever. I've really had to contain myself from rushing in and buying one of everything during our preorder period. I do have a few though already...shhhhh so know I just have to make time and get cracking with some creations to share and entice you all.

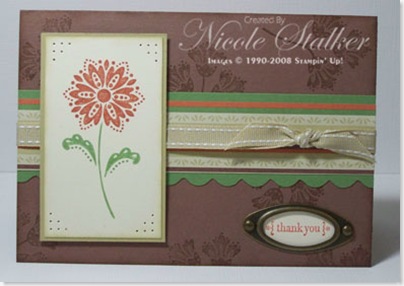
One of the sets that made the mini catalogue is True Friends. I was so happy this made it as I have wanted this set for some time since seeing it in the US catalogue but of course the only way we can purchase it is if it makes it to Australia. You have probably gathered by now that this set was one of my first purchases so of course it is also my first share with you all.

True Friends 1

Along with the stamp set we also have the co-ordinating Designer Series Papers called Apple Cider. I've used a touch of one in this card and then tied River Rock double stitched ribbon on top. Oh and another thing is that a few of the new In Colours co-ordinate with this paper too. 

One thing I haven't yet told you about the Spring Mini stamp sets is that they are all die-cut. How wonderful is that? You can all be stamping with your new sets the same day they are delivered.

Supplies:
Stamp sets: True Friends, Occasional Greetings
Paper: Close to Cocoa, River Rock, Wild Wasabi, Very Vanilla
Ink: Close to Cocoa, River Rock, Really Rust marker, Wild Wasabi Marker*
Accessories: River Rock double-stitched ribbon, Antique Brass Hodgepodge, Small Corner Rounder Punch, Small Oval Punch, Paper Piercing template & tool (Tool Kit), sponge dauber.

*Wild Wasabi Marker is made using a blender pen and reinker.


 photo Nikki4.png

I'm back


Sorry about my absence for such a long time.  I've been in a bit of a slump as far as stamping has gone. Firstly I lost my mojo (well maybe just misplaced it for a litle while) and I also lost my drive as I've been struggling to find some new customer and workshops. Now this last one hasn't changed so if you are looking for a demonstrator to hold a workshop or just place an order please remember me. You can email me at nicole@nicolestalker.com.au for further details.

On a more positive note I've had some exciting changes going on at home during our recent school holidays. My hubby agreed to me changing my stamping room. I now have a dedicated room just for my craft where as I used to have our business computer, filing cabinet, etc in my room too. I also went to a bigger room and went shopping at IKEA for furnishings and have it pretty well organised.

Well are you interested in seeing pictures?

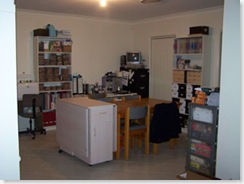
Looking in from hallway This is looking into the room from my hallway. We are going to put bi-fold doors on at a later date but considering this room used to be more of a storage area it's a big improvement. It's also the first room when you walk into the house from the front door.


That fabric wall again

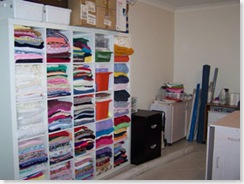
This is another shot from my hallway showing my sewing area.  I emptied 11 40litre storage containers worth of fabric into this one unit. Looks kinda cool, don't you think?? Now I just have to make sure I put it to use more often as I have hardly done any sewing in years. No excuse for not knowing what I have or where it is now. The small filing cabinet holds my sewing patterns in one draw and my non-SU cardstock in the other.


From sewing area looking towards computer,etc


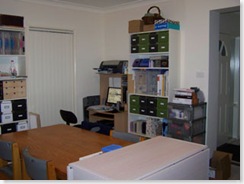
\This is taken from the sewing corner. As you can see my computer in the far corner, my extra worktable (this will come in handy for my classes so the main dining table is spared) and 1 of the 3 bookcases holding my stamping supplies.


100_0972


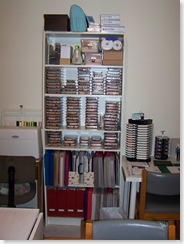
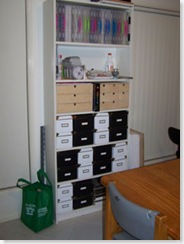
This is another of my bookcases which contain current SU stamp sets and scrapbook paper storage along with a few other things. This is next to my new worktable so they are at hand.


More bits & pieces


This bookcase houses only a few SU things and the rest is other supplies. I can't part with everything and it's nice to play with some other items at times. Mind you they don't get used all that often anymore but you never know.


My new work table & draw unit

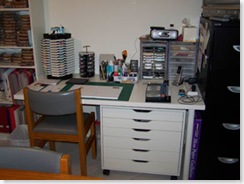
This is my new worktable which still has to have some wall shelves added with some countertop flourescent lights.  The filing cabinet holds all my SU cardstock along with my business supplies. The draw unit is on castors so I move that out of the way when I stamp and have an extra desktop on hand for those extra things that just don't have room on your desk when you are creating or that build up while you are creating.


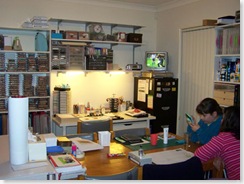
With my wall shelves and lights up This is the final shot with my wall shelves and lights now up. So much better to work at now. That's 2 of my girls sharing their company with me. Plenty of room for them to craft with me now too.

There are only 2 more changes to be made. I have wall shelves still to go up above one of my sewing machine tables next to my SU bookcase and also hubby suggested putting up a wire shelf above my other sewing machine (next to my fabric wall) to hold my rolls of fabric so they are off the ground.


So what do you think?? Isn't it great.

Now to just get creating more......


 photo Nikki4.png